


Are you looking to get started in the field of open-source software development? If so, then chances are that you will be coming across Git and GitHub.
Open-Source projects that are hosted publically in repositories are typically managed by Git. Trust me, it might be overwhelming at first to get hold of Git and GitHub and understand its usage. Through this blog, we'll try to look into how Git plays an integral role in a software developer's life and learn basic GitHub workflow.
Sneak Peek: Introduction to Git and Github 🧑💻
Just before we move ahead, let's look at how Git and GitHub work and how they are different from each other.
Git is an open-source distributed Version Control System (a fancy way of saying it helps to track and manage files) developed in 2005 by the creator of Linux Kernel, Linus Torvalds. Whereas, Github is a social code hosting platform that integrates with Git.
As a software developer, you're going to be pair programming a lot, be it for work or hackathons or on any project in general. To avoid any conflicts between your code, a Version Control system like Git is needed that helps to track and manage your codebase. GitHub provides you with remote repositories that help you accomplish the same.
Short note - We can use Git without GitHub but vice-versa is not true. GitHub has several alternatives like GitLab, BitBucket and more.
Installing and Configuring Git
Check out Git's website to download Git on your local machine as per your operating system.
Here's a gif demonstrating how to download Git on a Windows device.
Quick Note - The process might vary over different OS systems.
You'll need to run the installer that you just downloaded and set up Git on your system
Now, you can try running the following command in your command-line interface to check if you have successfully installed Git.
git --version
If it shows you a version of Git (something like git version 2.36.1), you are good to go! You have successfully installed Git on your system!
Creating a GitHub Account
Hop on to GitHub and create your own GitHub account that you will use to create remote repositories and find open-source projects as well.
If you're a student, do consider getting a GitHub Student Developer Pack which provides you with different tools and resources to head start your tech journey.
The Git and GitHub Flow
Thereafter, there are some terms related to Git that you might want to get a hold of beforehand.
- Repositories - File location where all your code rests
- Commit - An individual change to a file
- Branch - A line of development where the most recent commit on a branch is referred to as the tip of that branch
- Pull Request - Pull requests are proposed changes to a repository submitted by a user and accepted or rejected by a repository's collaborators
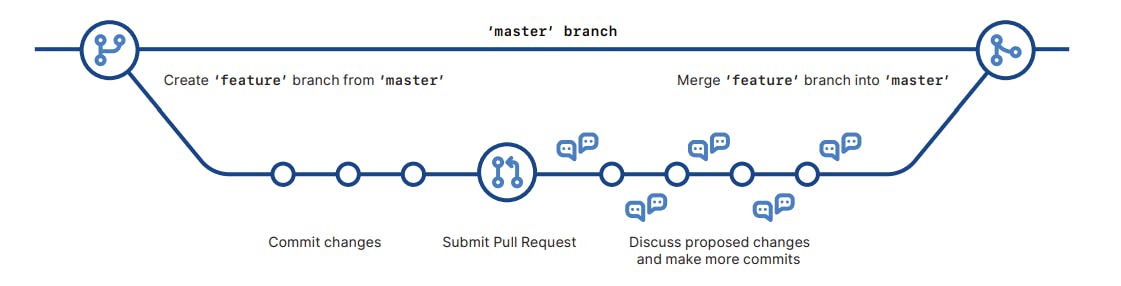
Snap from GitHub's Cheat Sheet
As seen above, we are looking at a GitHub flow visually. It is a branch-based workflow which involves creating branches to save your work without affecting the master branch.
This helps other collaborators to review your code through Pull Requests and also discuss, answer questions, and propose suggestions to the code.
Here's a tool that'll help you visualise the Git workflow and understand the concept of branches and commits. Feel free to play around and learn, we'll use it later!
Creating Your First Repository
Whenever you're starting out to work on a project, you'll need to set up a local git repository in your project's directory. Open your command-line interface or Git Bash to get started!
1. Initialising a local git repository
git init
Tip - Always make sure that you are in the correct project's directory before running the command. You can always run
git help <command>to know more about the specific command
2. Adding new files to the repo
Go ahead and open the project directory in your preferred IDE and start working on your project
code .
    // To add all your files to the stage (place where you can pick which files to commit at once)
    git add .

    // Else, you can run the following to commit separate files
    git add <filename1> <filename2>
    // To check what is on the stage
    git status
Here's a demo gif illustrating the usage of the above git commands where I add and commit a test markdown file to the local "my-test repo"

Notice how a hidden .git file is created to track all your files in the directory.
3. Creating a new remote repository on GitHub

Congratulations, you have created your first GitHub repository! 🎉
4. Adding the remote repo locally
Once you've created the repository on GitHub, you can see GitHub asking whether you have already set up your local git repository or you would like to create a new one.
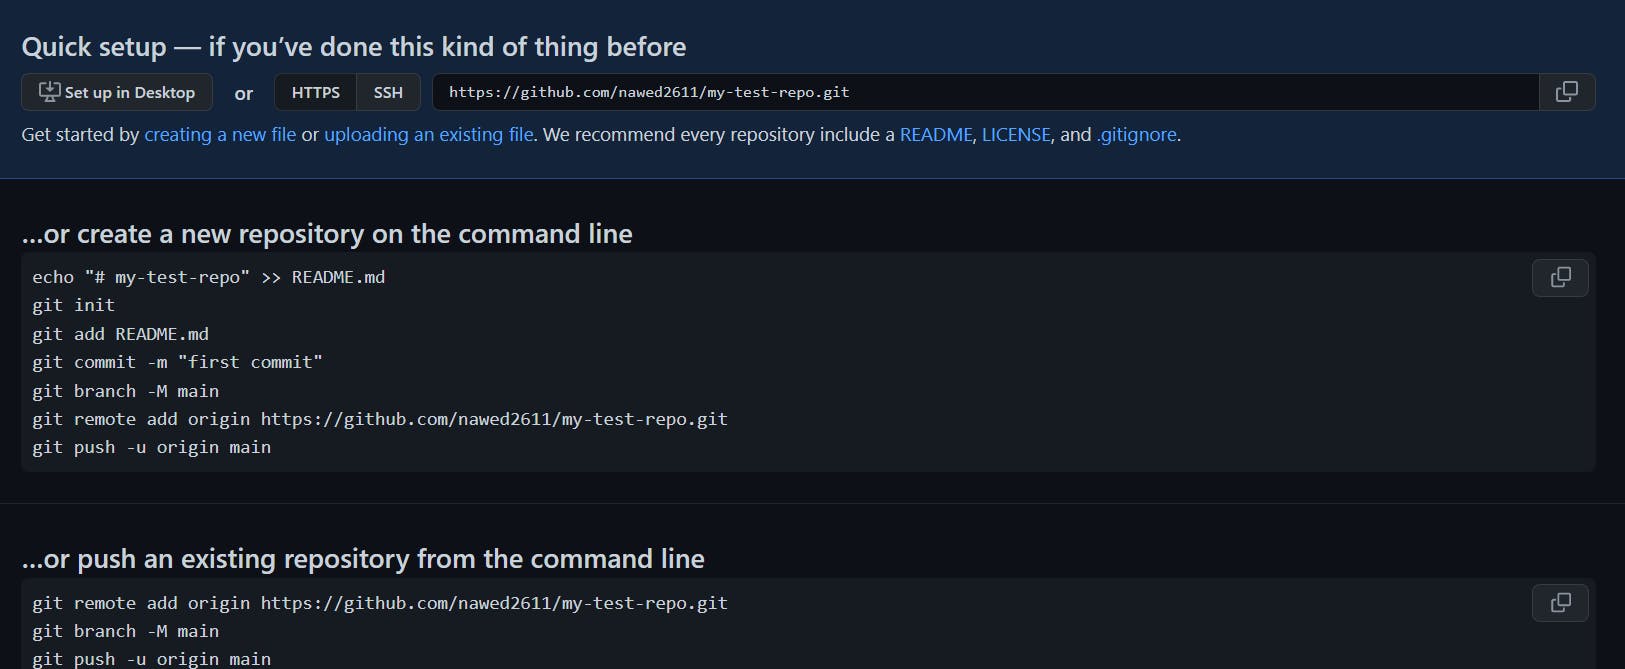
Copy the .git link you can see in the above image as we'll use it to integrate our local repo to GitHub.
Now, hop on to Git and add the remote repository.
    git remote add origin https://github.com/<yourusername>/my-test-repo.git

    // Adding sample text to test.md file
    echo "# my-test-repo" >> test.md

    git add .

    git push -u origin master
In the above code snippet, we are adding a line to our markdown file and pushing it to the remote repository.
5. Pushing Branches to GitHub
The concept of branches is something you as a developer need to know about and would be using a lot.
    // To see the list of branches
    git branch

    // To create a new branch
    git branch <branchname>

    // To checkout (switch) to a different branch
    git checkout <branchname>

    // To create and checkout to a branch
    git checkout -b <branchname>
We are going to create a new branch called "v2" and make some changes to the test file
    git checkout -b v2
    echo "## Hello from the v2 branch" >> test.md
    git add .
    git commit -m "my first commit on v2 branch"
    git push origin v2
Wooof! that was a lot, but we have finally pushed our v2 branch 👀
Making your First Pull Request (Woohoo!)
Well, we have now reached an exciting part of our modest Git and GitHub journey so far. Head back to the GitHub repository and you should see what the following image depicts.
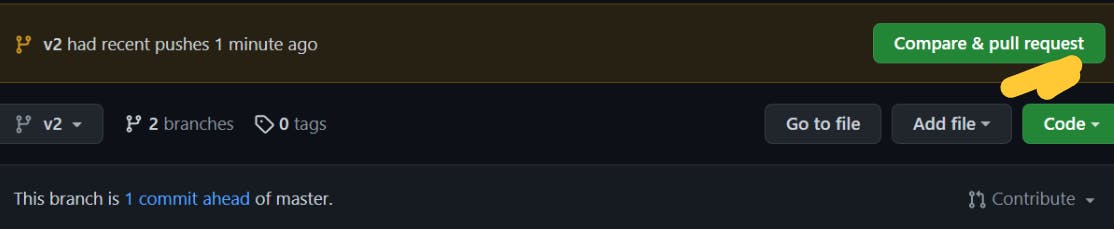
Go ahead and click that button!
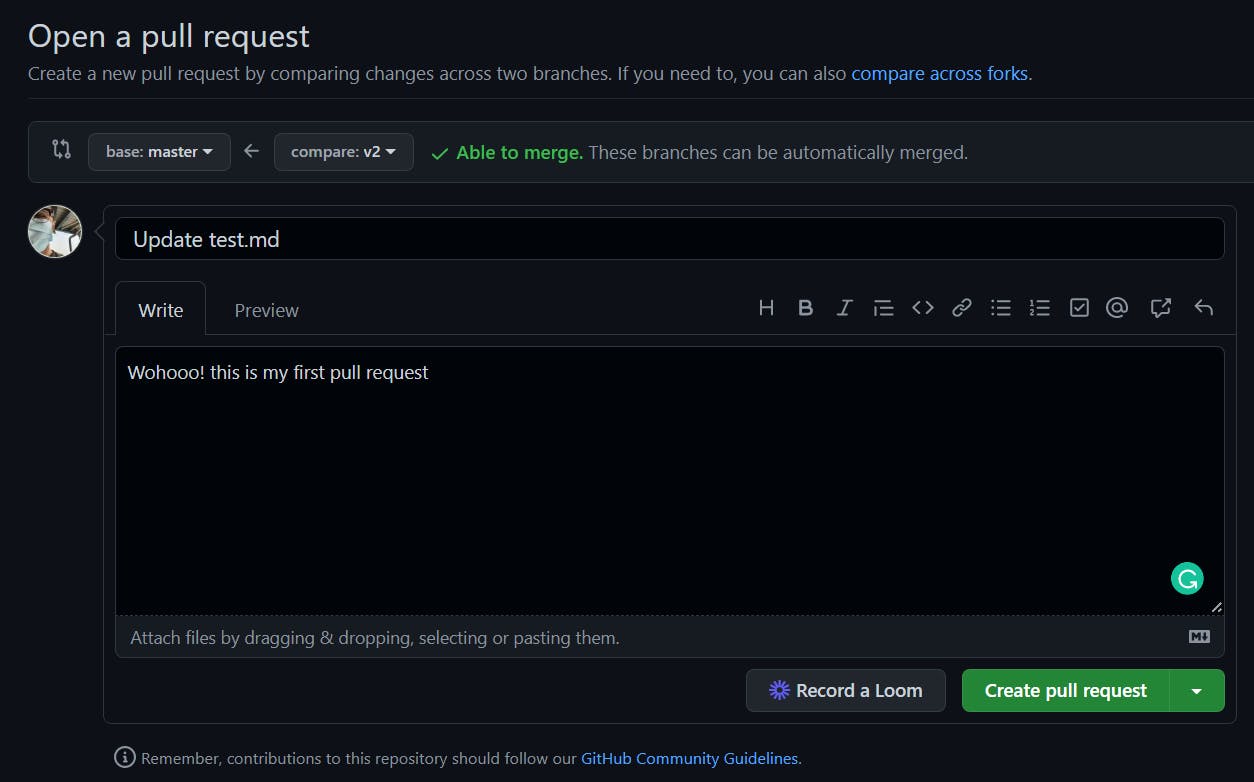
Make sure to be as descriptive as possible in the description box while creating a PR
Congratulations! You have just created your first Pull Request 🧑💻🎉
What Now?
Since you are the sole owner and collaborator of the repo, you can merge the PR you just created and then delete the v2 branch (recommended to keep a tidy repo as you have already merged the branch).
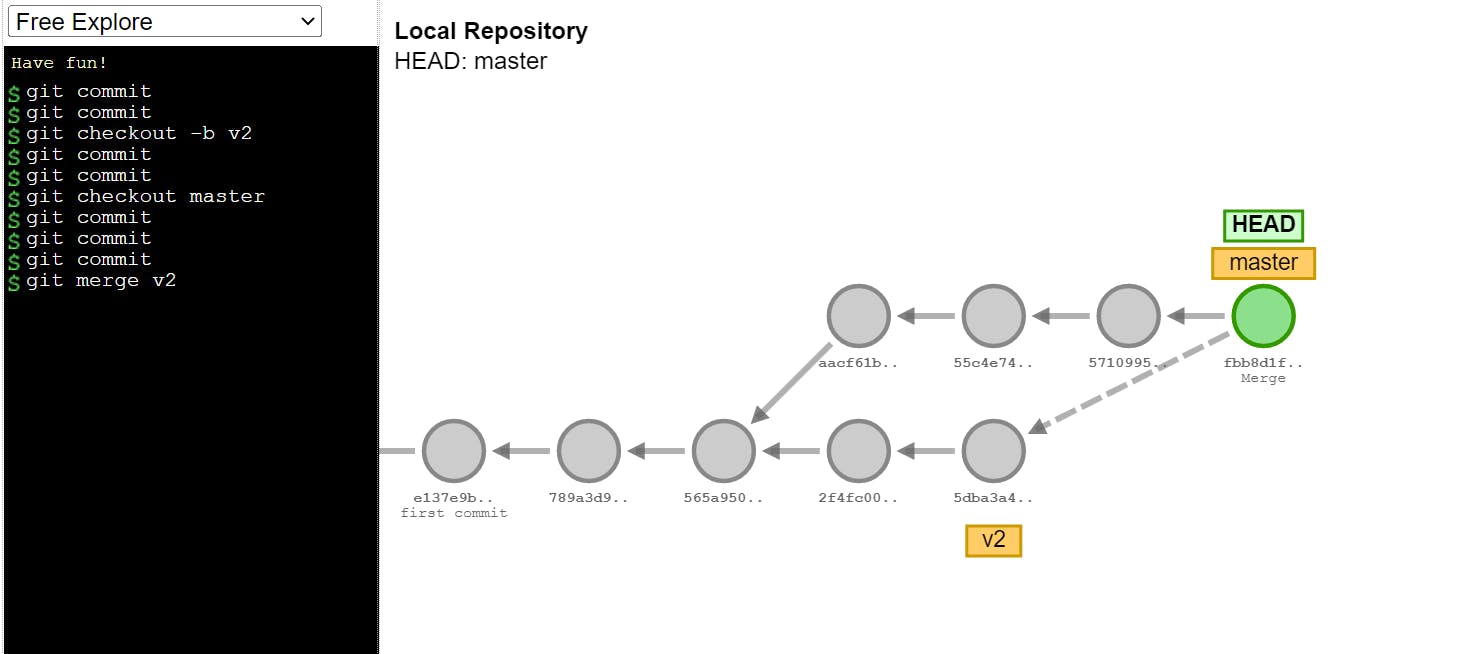
Following is the image that visually represents your work so far. We created two branches - "master" being our main and a v2 branch.
Made some commits and in the end, merged them together. Notice how HEAD is pointing to both the branches at the same time.
GitHub Good Practices
Lastly, we are going to talk about some GitHub good practices that you should follow and not make mistakes like these👀
1. Every commit should be small and coherent
We should generally avoid committing large files as they make it difficult for someone to review your code. Try making clean single-purpose commits.
2. Maintaining descriptive Readme.md files
A well-documented project is always a good habit to have as it makes up the first impression of your project. Further, keep your Readme.md files updated as your project evolves
Here's a sample Readme file template that you can use for your projects - %[github.com/elsewhencode/project-guidelines/..
Did you know that a repository with the same name as your username will be visible on your profile page? Make the most out of it as you may be using it as your Resume at times.

3. Use of .gitignore to prevent tracking of files
You might want Git not to track some of your files in the directory. Files like dependencies, system files or your private files containing some personal information should be added to the .gitignore file.
4. Effective use of Branch-based workflow
Creating dedicated branches that work on a particular feature, bug, or issue. It also allows you to create multiple PRs without any confusion
5. Writing good commit messages
It makes life for all of us easier if we are following certain guidelines in writing commit messages (source)
- Capitalise the subject line and do not end with a period(.)
- Use of present tense
- Limit the subject line to 50 characters and Wrap the body at 72 characters
- Use the body to explain what and why as opposed to how
That's it, welcome to the world of open-source through Git and GitHub where all ideas take the mould of a Pull Request 🙌